In this tutorial I’ m going to explain how to implement in-app purchasing for Unity3D Android.
First things first, to sell products you need a merchant account. If your country is supported I believe you have already registered for it. If not go ahead and register for merchant account from your Developer Console.
Second you can find the demo project I made from github. Go ahead and download it.
1. Part: Preparing you application at Developer console
Before beginning I would recommend you to read google’ s official documents for implementing in-app products here, I’ m going to cover them just for Unity3D implementation.
So let’s begin, go ahead and create your application on google play store. As you may noticed you won’t be able to add in app products to your application until you upload your .apk with this permission in your manifest ;
<uses permission android:name=”com.android.vending.BILLING” />
I prefer uploading final .apk to alpha testing section when all coding is done, but you can do it whenever you want. Just remember this is important to test your in-app purchases you have to upload your apk to “Alpha Testing” section and publish your app. You could use draft application for testing but google has recently changed it to Alpha Testing section. Also you have to add your tester’ s gmail accounts to “Settings/Account details” section of your Developer Console.
2.Part: Unity Project
There isn’t so many things to do from Unity for in app products. Almost every magic done from Java side. But there are things to from Unity, I have created a simple project with a sample scene and a simple script with 5 in app purchases. Go ahead and open the unity project inside the repository you downloaded, and open AndroidManifest.xml inside “Plugins/Android” folder. I have made TODO comments inside that manifest, this part is important, remember to change your own package name from there and also from Unity editor’s build settings!
Also take a look at SocialPlugin.cs script inside Plugins folder. This script just c alls our Android Plugin methods. Our actual method is “callBuyCoins” where we purchase our products.
After you change your package names go to build settings, add test scene, check “Google Android Project” from right and hit export to anywhere. After that import that exported project from Eclipse. Well that’s it with Unity part.
3.Part: Eclipse Project
From Eclipse we are going to import 3 projects , those are;
- “google play services library” and “UnityEclipsePlugin” from our repository
- Unity generated Eclipse project.
After importing all those projects, if you come up with any error just right click the projects and check Android / Library section.This might be confusing but you have to add google play services library to UnityEclipsePlugin as a library. And UnityEclipsePlugin to Unity generated Eclipse project as a library.

 4.Part: Refactoring needed


After importing projects correctly we have to change some code.
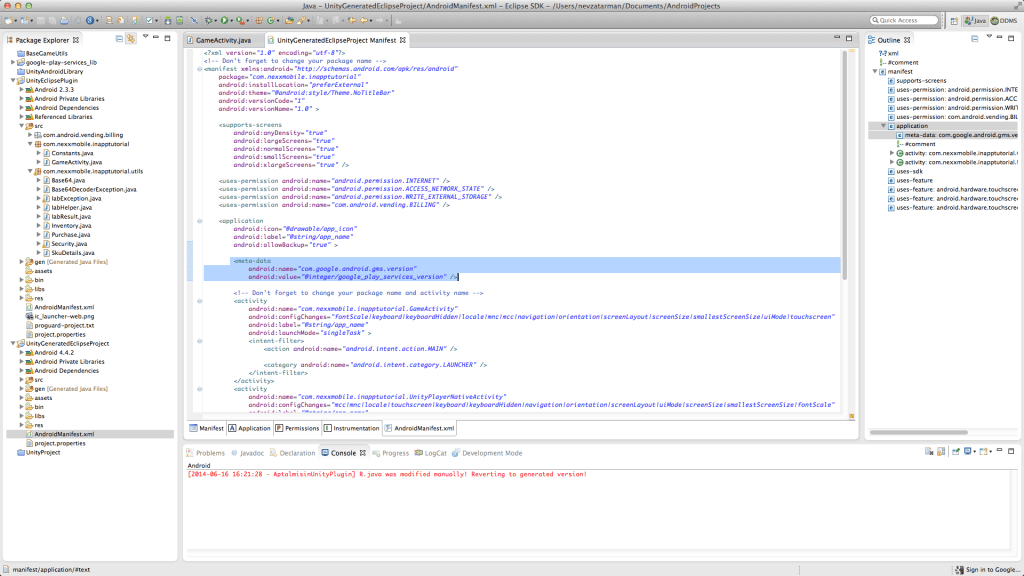
- First open AndroidManifest.xml of UnityGeneratedEclipseProject and uncomment meta line of google play services version. Without this your app won’t work!
- Open GameActivity.java from UnityEclipseProject, I have made some TODO comments please read them carefully those comments explains that you have to do after this stage .
- First comment, refactor “com.nexxmobile.inapptutorial” with your own package name that you used at your manifest file.
- Second comment, set your own in-app purchases( they are string values and you are going to use their values at developer console to add your products for sale). I am not going to cover how to add those products to play store you can check official documents from here. Just keep in mind, in this demo project all those products are consumable. (They are coins, so we can spend them and buy whenever we want).
- Third comment, your “base64EncodedPublicKey”. This is your packages public key generated by google play. You will get it when you upload your first apk. Just dont forget to sign your application with your production keystore!

5.Part: Final
To finalize our project, go ahead and build your APK. from UnityGeneratedEclipseProject and upload it to Alpha Testing section at Google play developer console. You will not be charged for your purchases while your APK is in Alpha Testing! Again please refer to official documents for more info.
After uploading you will be able to add in app products from the left bar. Add your desired products with same values we have given from our plugin. Next go to “Services&APıs” tab from left and copy your Base64 key and paste it into your GameActivity class.
Build your apk again from Eclipse , upload it and wait for couple hours for your testers to receive it. That’s it now we can sell products from our Unity games.
PS: GameActivity has 2 extra methods like sharing from twitter etc. Might be useful:)

Leave a comment