This tutorial is not going to be an update to my previous post actually. I’m going to show a different method, an easier one. On my previous post here, I showed how to make a toast by making a library project on Android and overriding Unity. But I received some comments that it might get a bit confusing. So for those who doesn’t want to override Unity’s current activity and of course doesn’t want to make an android library project here is the easy way.
First go ahead and download my example repository from Github. My repo contains just a Unity project.
The example project contains an example scene with a demonstration with a simple GUI and a script that calls native methods for;
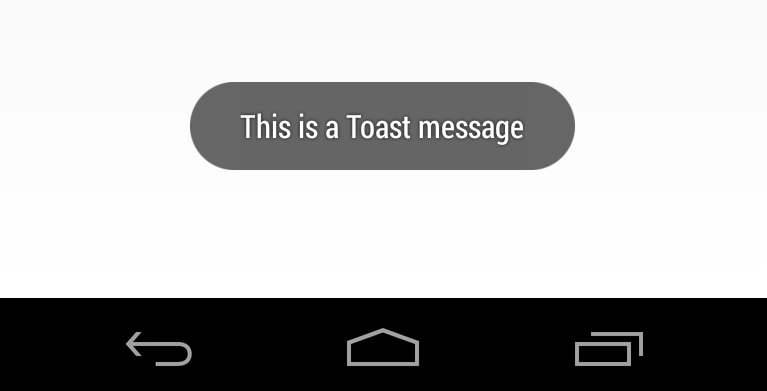
- Making a toast message.
- Showing Alert view.
- Facebook and Twitter sharing and also a share intent.
- And immersive mode code for the phones that supports it.(with Unity5 it’s been enabled by default)
- WebView example.
- And two extra methods about your installed applications(isApplicationInstalled and openApplication).
Just import UnityAndroidExtras package to your own project and you’re good to go. Inside demo folder check /Scripts/Demo.cs script!
This tutorial is simple explanation of the folder called “GoogleAndroidExport_experimental”. There is a package inside the folder you can add it to your own project. It’s an interesting method thats why I’m writing this tutorial:) Anyway you can just build and run the demo scene from /Demo/Scenes/Test_build_run.
First a short explanation for to-do list for this tutorial:
- Write our plugin script from Unity which calls java methods.
- Export our project as Google Android Project option selected from build settings.
- Import the project into eclipse, and navigate to src/yourpackagename/UnityPlayerNativeActivity.java
- Add java methods that we are calling from Unity(makeToast, shareOnTwitter etc…) inside UnityPlayerNativeActivity.java file.
- Run as Android Application on your phone.
We are adding our java methods into freshly build google android project thats why build and run option from Unity won’t work! And yes every time you export your project you have to add your methods into UnityPlayerNativeActivity.java unfortunately.
Hack: For this I made a post process build script with some System.IO methods that changes unity exported UnityPlayerNativeActivity.java automatically after your build is done, so that we will never deal with copying and pasting same methods over and over. You can find the java file we are copying inside UnityAndroidExtras/Editor/Files folder. You can make your own changes add your own methods inside it. The only thing you need to do is export it and run it from Eclipse thats all!
Experimental project in detail,
1- Writing Unity Plugin Script
I’m not going to explain this part in details, if you look at my previous tutorials you can easly understand the work here. From this script we are just calling our java methods. You can find this script inside /GoogleAndroidExport_experimental/UnityAndroidExtras/Plugins/ folder.

2- Exporting as Google Android Project
The demo project contains all java codes that we will call, inside /GoogleAndroidExport_experimental/UnityAndroidExtras/Editor/Files folder. You can take a look at UnityNativePlayerActivity.java file there. You can find this java file if you export the project as google android project under src/yourpackagename/ folder. What I did was taking this file and adding the java methods inside this and putting under Assets/Editor/Files folder. Folder name is irrelevant actually it’s what I choose.
Then I just wrote a postprocess script that swaps our java file with Unity that builds after you export the project. You can check out the api documentation from PostProcessBuildAttribute from here.
Note(irrelevant with tutorial): I’m copying also .xml files inside /Editor/Files folder if you have any. You don’t need to mind that it’s just, if you are using Google play services in your project and having your own AndroidManifest.xml file with a integer line of Google play services version inside and try to build it form/Plugins/Android folder, well Unity gets mad so I prefer storing my Manifest.xml file and swapping it. Too lazy to copy and past:)

Only thing you have to do is hit export button and everything will be done automatically. I have added a unitypackage inside the Assets folder, if you want to use it for your project the only thing you have to do is exporting as Android project!
3- Running Your Project From Eclipse
- Right click on your workspace, hit import.
- Select Android application and select your Unity exported project and hit ok.
- After import make sure your imports are all done and you have no error.
- Right click on your project and run as Android Application, thats it !
Note:Just beware if you are using any plugin that overrides unity’s current activity this shortcut solution might not work for you !

Leave a reply to nevzatarman Cancel reply